Overview of CAD 2
CAD 2 is a more advanced and in depth class for students who want to pursue drafting beyond CAD 1. This course continues to build on skills that were introduced in CAD 1, while adding new skills and knowledge not covered in CAD 1. A few areas that this course goes more into depth on would be mechanical drafting, AutoCAD, and Onshape with much more complicated techniques and drawings. Furthermore, this course expands on more complex views and detailed dimensioning. Finally, CAD 2 reviews the manufacturing materials/processes and focuses on 3D printing/modeling. For any student who has an interest in engineering, mechanical, industrial, or architecture and design careers, this is the course for you.
Mechanical Drawings
To begin the course, we focused on mechanical drafting. Mechanical drafting may not be the most advanced and modern way to draft, but it is still important to learn the traditional basics of drafting on paper. When comparing CAD 2 to CAD 1, the mechanical drawings within CAD 2 are much more detailed, complex, and require a higher grade of skill. More complex types of mechanical drawings that are drawn with the CAD 2 course are orthographic and isometric, which require the student to thoroughly think about the object and how it will be drawn. In order to be successful, the students learn that they need to sketch out the object on another piece of paper before actually drafting the object out for a grade. Finally, students will use different size paper to properly draft objects. Mechanical drafting may be inferior to more modern styles of drafting such as AutoCAD, but it is helpful to have an understanding and knowledge of all types of drafting in order to be a successful drafter.
Manufacturing/Materials Presentation
Problem Solving Week
Building a Tower to Hold a Metal Block
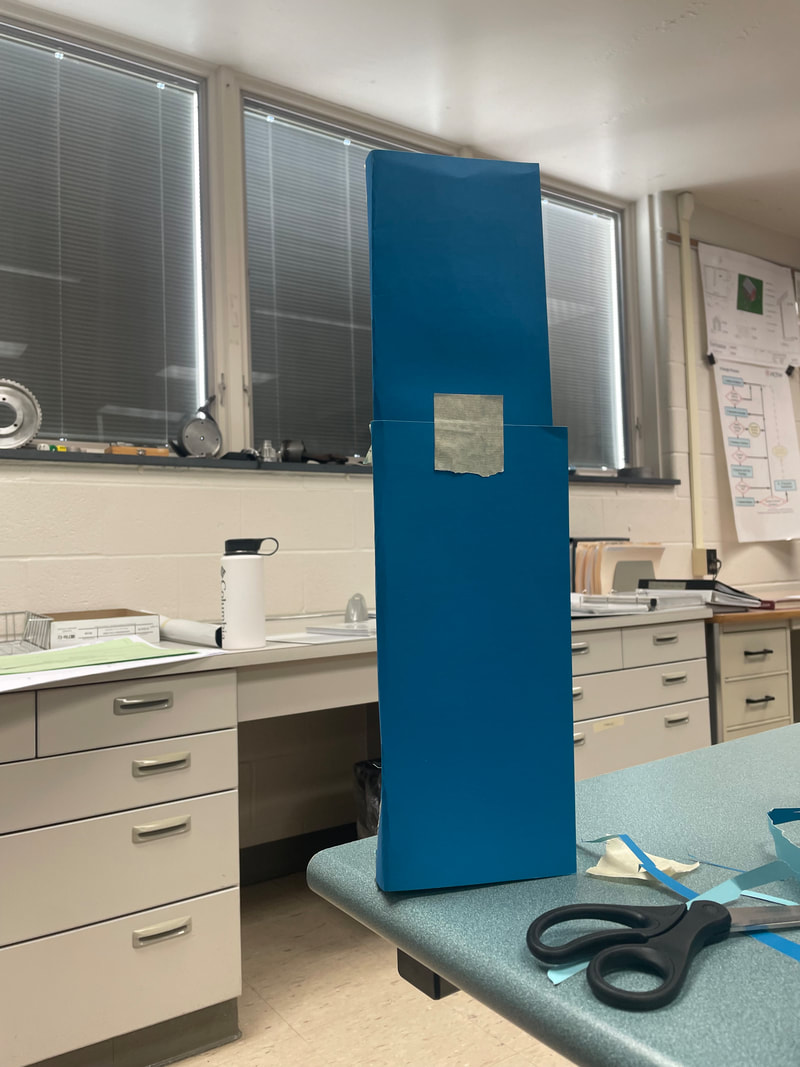
First Trial First Trial
|
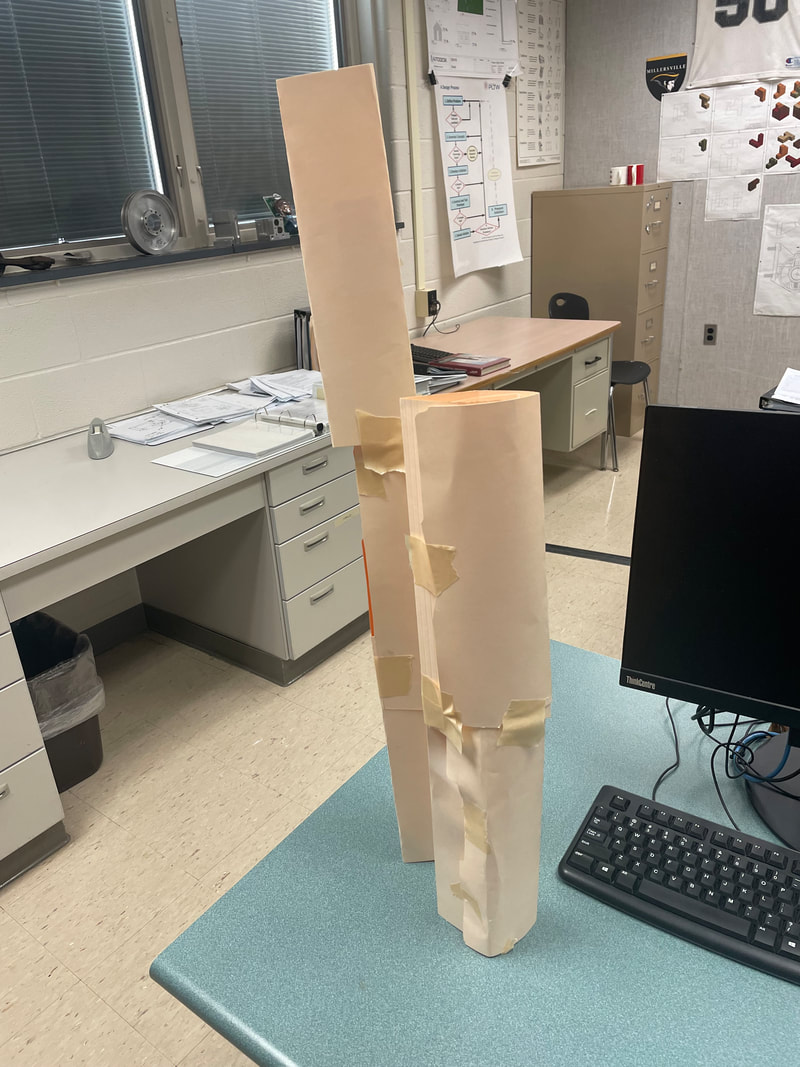
Second And Third Trials
|
|
|
For our first problem solving project, our task was to construct a tower with only two paper folders, 20 inches of masking tape, and a pair of scissors. The class only had about an hour to complete the task and the paper tower had to hold the metal block for 30 seconds without being supported by the individual or anything else. The catch was that you needed to make the base as small as possible and the height as tall as possible in order to score a good ranking with your fellow classmates. For the final scores, we needed to take the height^2 divided by the base. For my first trial, I built a tower that was able to hold the block up, but the base was way too wide and the tower itself was not tall enough to earn top three in the class. For the next two trials, I made the base significantly smaller and the height even taller in order to improve my previous score by double. In the end, I had tough competition and finished second to last, but I used my problem solving skills to improve from by prototype to my final build.
The Slow Roller

To finish out problem solving week, the class was tasked with the Slow Roller project. The goal was to create a model that rolled down a wooden slope at the slowest speed possible, while having to fit within a 30-30 cm cube and being under a weight of 200 grams. The model had to roll(not slide) down the ramp without falling off to be counted as a "good" run. I created three different models, which incorporated different techniques. My first model (model on far left), was made out of rebar, plastic trim, and cardboard foam. Out of the three, it was my only successful run at around 7 seconds. After testing the first model I realized that in order to make it slower I needed to make it lighter, which is what I based my second model on (model on far right). I used a small dowel rod for the axle and cut pieces of a folder for the sides. The problem with this model is that it had a hard time rolling down the ramp. It was almost too light and it would get stuck within seconds. For my final model (center model), I completely scratched all my other ideas and went for something different. I based my model on a flywheel design, which Mr. Zeroth had recommended. The materials that I used were a bigger dowel rod for the axle, foam cardboard, and sandpaper to give the axle more grip when going down the ramp. In the end, the sandpaper was catching on the ramp too much, causing the model to get stuck at the top of the ramp. From this project, I learned that a good model needed large sides with a small axle, to make the model go through more rotations to get to the bottom of the ramp. Overall, problem solving week was very educational, and it taught the class how to analyze a problem, create a prototype, test the prototype many times, and create a final model to solve the problem.
AutoCAD
For the next main section of the course, the class completed a few AutoCAD drawings. AutoCAD is a computer aided drafting and design software, which was developed by Autodesk. The mechanical style of drawling does not compare to AutoCAD's super accurate and efficient software. After getting reacquainted with the different tricks and techniques, the class was able to fly through the drawings. AutoCAD is nice because when you make a mistake on the computer all you have to do is push the undo or erase button to correct it. On paper, if a mistake is made, it is much harder to fix and can lead to the need to restart the drawing. AutoCAD is the modern day mechanical drawing tool, which is utilized by many industries within the engineering and architecture world.
Onshape Working Drawings
For our third drafting unit, we used an online computer aided drafting/design system and software called Onshape. The main difference between AutoCAD and Onshape is the fact that AutoCAD is strictly for 2D, while Onshape is mainly known for 3D drawings/design options. Onshape also allows the user to choose different materials from its material library, which then applies to the object for real life statistics, such as weight, volume, and surface area. Within this Onshape unit, the class focused on isometrics, section views, details, auxiliaries, and assembly. Translating the text book drawings into Onshape can be challenging at times, but it is rewarding to be able to see a 2D object become life-like in 3D. Onshape is a system that shows how far drafting and design have advanced within the modern world.
Onshape Sections
Onshape Auxiliaries
Onshape Assemblies
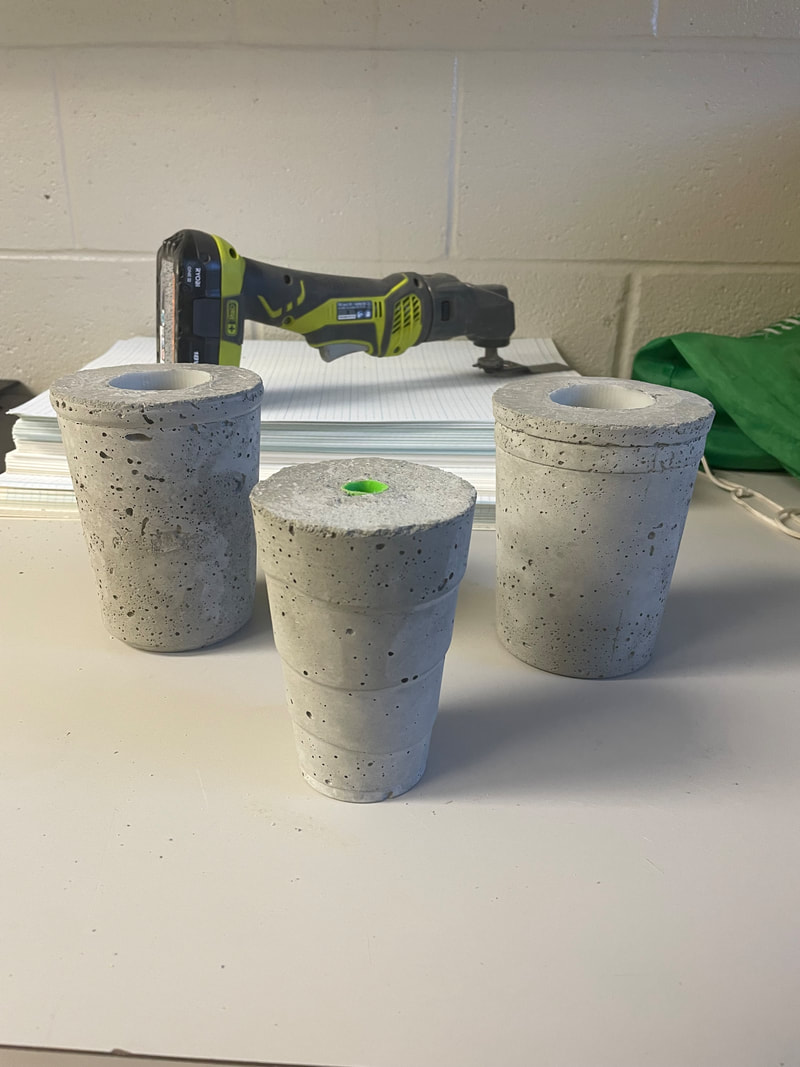
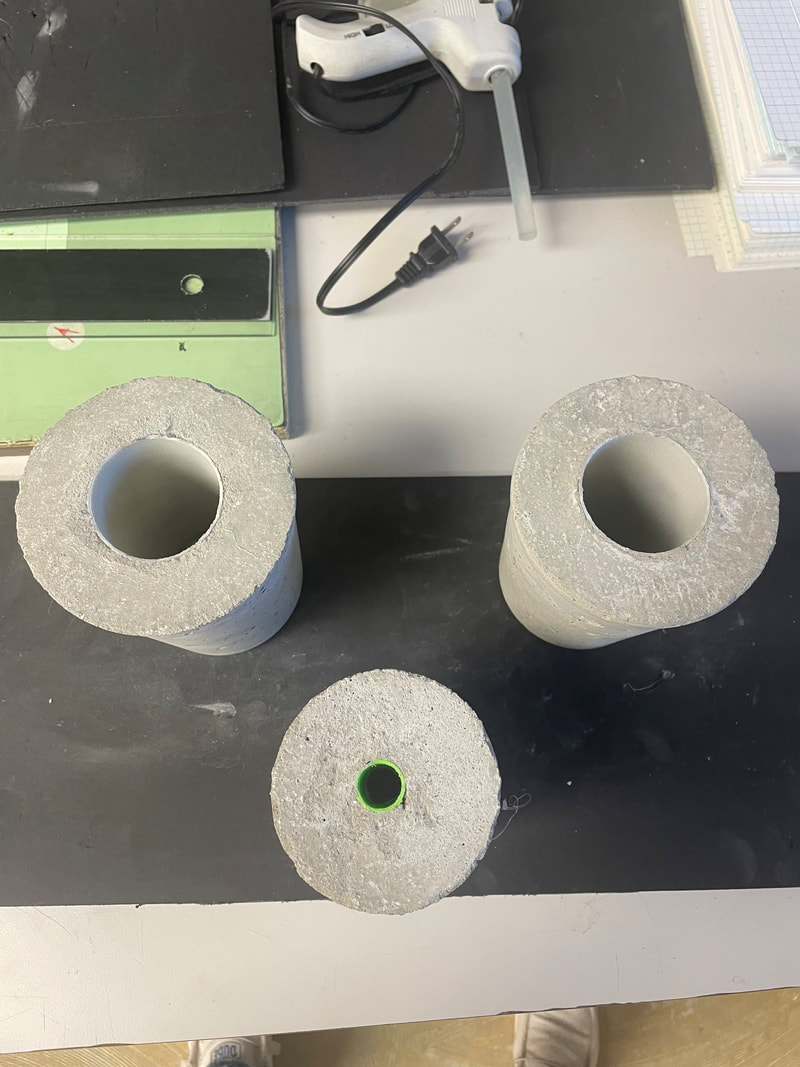
Concrete Project
|
|
During concrete week, my partner and I created three concrete vases. We used 2 containers, 2 red solo cups, 3 straws (3D printed), wire, concrete, and water. It was a very fun project even though everything did not work out perfectly, we learned from our mistakes and improvised to the best of our ability. The project not only taught us about concrete, but about the real world experience of problem solving. The steps we followed are listed below:
1. 3D print hollow tubes
2. Glue/attach tubes to containers
3. Add concrete and right amount of water into bucket/container
4. Mix concrete and water together until right consistency
5. Pour concrete into containers around the tubes
6. Insert wire into concrete for structural integrity
7. Smooth out top of concrete with margin trowel
8. Allow concrete to solidify
9. Cut excess part of tube sticking out of concrete
11. Remove the mold (container)
12. Touch up concrete by trimming wherever is needed
Architecture
For the Architecture unit, the class was tasked with designing a house on Revit, based on floor plans our teacher supplied us. We had useful tutorial videos at our disposal, but other than that we were on our own. Revit is a software focused on building information modeling for architects and engineers. At many points across the unit I became stuck and unsure of what to do next, but getting that experience is necessary. When you're faced with a problem, you need to persevere. Fight the urge to give up and work to find a solution to the problem. Architecture is a fundamental skill that students need to know going into the construction and engineering fields, but being able to problem solve is a critical skill needed for any career. No matter what you do in life, problem solving is an essential skill to have.
Conclusion
In the end, Computer Aided Drafting 2 has expanded my education and knowledge within the fields of drafting, engineering, and architecture. This class has improved my skills with mechanical drawings, while introducing the computer software AutoCAD and Onshape. Other areas that were introduced were problem solving and concrete. I found after making the concrete project, that concrete is a very fascinating material to work with, and it can make some awesome looking vases. During the architecture unit, it was a good experience to design a full house pretty much all on your own. When we ran into problems, we had to persevere and solve them, which is a necessary skill to learn for any career. In the near future, I plan to pursue a civil engineering degree at York College of PA, as I have found this field to be very interesting and rewarding.
